
Whether, just starting out with extract brewing or making the leap to all-grain most new brewers see the venture with an equal mixture of excitement and trepidation. As experience increases, so does comfort, and comfort often breeds a creative drive to search out new, untried processes.
At some point this cycle leads every brewer to recipe design. The fires of these first recipe ruminations, bellowed by a comfort of the brewing process, burn hot and often tend toward the overly complex. It is easy to let ideas of that perfect beer run away with every ingredient you can think of; a 50/50 split base malt and 6 specialty malts, two adjunct grains, and 3 separate hop additions, plus dry hopping… may sound like the makings of a grand idea, but complexity of a recipe does not necessarily beget good beer complexity or balance.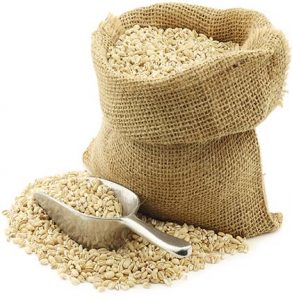
A couple synonyms for complexity are difficulty and involvedness, add higher expense and you’ve covered what a complex recipe equates to. You end up paying more for ingredients and the brewing process often becomes more difficult and time consuming (though some single malt brews can be quite time consuming also). I’m not saying there’s no place for complexity, but I strongly advocate keeping recipes as simple as possible.
So, how many players do you have tossing cards into the mix when you brew? Six? Seven? More? Let’s par the players back a bit for the moment and look at the simplest recipe possible. Using a single malt, and if you really want to get extreme, a single hop (SMaSH). A brewer’s solitaire if you will.
Beyond possible cost and time advantages, brewing such a simple recipe gives a brewer connection to beers’ deep rooted history when many styles were made with just a single malt. It also lends insight into both the process of brewing and the ingredients used.
Ingredient Evaluation
The real worth of single malt brewing is the ability to evaluate ingredients — and maybe the pride that comes with making an awesome beer so simply.
Cutting out ingredients puts what’s left center stage. When brewing a single malt beer there’s no guessing which malt addition contributed which flavor or how much color it added. Being able to taste the flavors and see the color of single malt clearly helps the brewer build an individual profile for that specific malt.
Sure it’s easy to read that Vienna malt contributes an amber orange color and flavors of caramel richness and warm sweet malt. This builds an idea of what you’d expect from Vienna malt, but until you experience it naked and on its own, allowing your own senses to unravel exactly what the description means it remains simply an idea.
The same can be said for extract brewers, though don’t expect the same versatility or depth of character you can coax from single grain malt brewing. It is still a good way to evaluate the flavors and color contributions of different extracts. Armed with the knowledge gained from these simple brews you then have a better idea of what each extract is contributing to a brew containing multiple extracts and/or specialty grains. This can be especially relevant for those who are going to stick to extract brewing for awhile.
Hops can be evaluated the same way. Brewing with a single hop gives the best representation possible of what that hop brings to a beer. This is particularly useful if trying a new hop.
Using different yeasts to ferment the same basic recipe does the same for yeast. What is each type of yeast contributing? Is the beer sweeter or drier? Does it have more esters, less, and what flavors are those esters contributing?
If you’d like, you could even step further back in time and eliminate the hops! Crazy right? Not really. Before the European beer purity laws of the 1500s erased all but the hop from the bittering scene many other bittering herbs found their place balancing malt sweetness. Herbs such as yarrow, heather, sage, blessed thistle, dandelion, horehound, and many others were used.
Best Styles for Single Malt Brewing
Not all beer styles can be accomplished with a single malt recipe. Below is a list of those best suited:
- Pilsner
- Saison
- Scottish Ales
- Lagers
- Köslch
- Munich Dunkel
- Pale
- Barleywine
- Mild
- IPA
- Rauchbier
Best Malts for Single Malt Recipes
For a malt to work in a single malt recipe it needs a certain amount of diastatic activity. Diastatic activity is expressed in degrees Lintner (°L) and is a measurement of a malts ability to convert starch to sugar. Generally any malt with 30°L will convert itself and can be used in a single malt brew. Note that a malts diastatic potential decreases as it is kilned more. Diastatic ratings will also very between malt manufactures. Below is a general list of malts suitable for a single malt recipe.
- Domestic 2-row
- British 2-row
- Pale
- Lager
- Pale Ale
- Pilsner
- Vienna
- Marris Otter
- Munich
- Mild Malt
- Smoked Malts
- Rauch?
- RedX
- Victory
- Wheat malt
The Brewing Process
Deft manipulation of brewing processes further widens the possibilities of single malt brewing.
Temperature Control
Temperature control during the mash can create markedly different beers from the same recipe. You have some room to play within the Brewers Window of 147°F to 158°F. This is the temperature window where both beta and alpha enzymes are working best, but you can favor one or the other by being in the lower or upper temperature range.
A lower saccharification temperature allows more activation of the enzyme beta amaylase and a higher degree of fermentable sugars, thus creating a crisper lighter beer. With a higher temperature the enzyme alpha amaylase is more active creating more non fermentable sugars and adding body and a sweeter profile.
Boil Time
Boil time and vigor can also be used to your advantage in managing a single malt recipe’s complexity and color.
Shorten your boil time to only what’s needed for the hop addition, and decrease caramelization and melanoidin formation. Or increase the boil time, especially in the case of a barleywine, to take full advantage of these complex heat driven reactions and increase color and complexity.
One easy way to up the boil time without overly increasing brew day length is to start boiling when you have one or two gallons in the kettle. Continue to sparge as it boils. I’ve seen some single malt barleywines boiled up to five hours.
Experiment With Hops
If you have enough pots you can also split your wort into several boil volumes and evaluate different hopping rates or hop varieties. Ferment them separately and use the same yeast across the board, so you don’t have multiple variables affecting the beer.
If you’ve done a single volume boil you could split it into several fermentation volumes and ferment each with a different yeast strain to better understand what different yeasts bring to the finished product.
Why The Simple Route Is Sometimes Best
Simple or complex, you should always be mindful of what each ingredient you put into a beer recipe is contributing. Always ask yourself is there a simpler way to get the same results.
Single malt and SMaSH brewing have huge possibilities. This oversimplified approach to brewing can not only make some awesome beer, but help you build a more refined knowledge of each ingredient’s contribution and potential. Always take detailed notes during your brew day. This is always recommended while you’re brewing beer, as well as when you’re evaluating it after it’s completed. This recorded knowledge will go a long way in helping you add complexity to a recipe when, and if, you deem it necessary.
Happy Brewing!
Original post by: learn.kegerator.com
Leave a Reply
You must be logged in to post a comment.