

Let’s face it; everyone’s time is precious. Many people use brew days as a way to escape and unwind. Because of other commitments (kid, work, life, etc), finding a 4-5 hour free time period to brew was becoming more and more troublesome.
Options? To start brewing at 8pm and getting done between 12-1am or start at 5am or earlier hoping to get done before children got up.
Or, 3 hours for an all grain brew?! How? Well I’ll lay it out for you…
1. Organize the Day Before
I made sure everything I needed on brew day was where it needed to be. Pot cleaned? Check. Fermenter cleaned and filled with sanitizer? Check. Bucket filled with sanitizer? Check.
Organization can set you free. These small steps the night before can keep you calmer and more level headed the day of brew, not to mention save you plenty of time.
2. Use Preheated Water
The biggest time waster for most homebrewers is the heating of water. It doesn’t matter if you are brewing extract or all-grain, getting that water up to temperature takes time. The night before, you can turn up your hot water heater to the hottest setting.* This was an awesome “hack” for me. My heater, when at the hottest setting, has water coming out at 155°. That means I had to only come up 5 degrees to hit my strike temperature of 160°.
For those that are extract brewers, you just completely cut a corner and you can steep those grains right at 155°. One thing to keep in mind is if you have an electric hot water heater or gas. The electric heaters have magnesium anode rods in them to keep the element from rusting, which means that there is excess metal in your hot water, just filter the water.
I use a RV inline water filter and my water is good to go. However, magnesium is good for the yeast, but I have no idea how much those anodes give off at a time, so just play it safe, filter the water, and use a yeast nutrient (which you are using anyways… right??)
*Please Note: If you decide to turn up your hot water heater, please be careful. Especially if you have kids in the house. Always make sure to turn the water heater back down.
3. Multitask
During the “dead time” of mashing/boil is when I start to get anything ready for post boil. I take my partially filled fermenter bucket or carboy and give it a shake and drain the excess sanitizer. I then close the bucket up and put an air lock on it so nothing can get it.
During the mash (if you do not go grocery shopping like I do) start getting your boil additions lined up (mise en place for those cooks out there). This means getting your hops weighed and separated, Irish moss and yeast nutrient measured out, and any other kettle additions measure and ready to go.
This will help ensure that things go smoother.
4. Chill Fast(er)
I mentioned above that the longest parts of brewing are heating up water, and depending on how you chill, that can take just as long.
So we spend hours watching water get to temperature and now we have to get it back down. I spent so much time, money, and energy when I first starting brewing on chilling. I would by four bags of ice (at $2.50 a bag), and it would still take almost an hour to chill. Then I received the most glorious Christmas gift ever: an immersion chiller.
For a lot of brewers, buying a 50ft copper wort chiller may be a tough pill to swallow. My wife was smart enough to do the math. I had spent enough on ice to buy a chiller, maybe even two. It was literally throwing money down the drain. The chiller was such a good investment that it took my chilling time from about one hour to around 15 minutes.
Then my brew buddy had a brilliant idea. I knew that stirring the wort would chill it faster, but I didn’t want to have to manually stir for 15 minutes. So I bought a wine degasser. The degasser attaches to my drill. I pull the trigger ever so slightly and let the blades do the work. You don’t want to go full bore, just enough to get the wort spinning. Using this device I was able to get my wort chiller in about 7 minutes.
5. Clean Up Later
This is not a lazy thing, but it actually has some practical value. I usually clean my mash tun during the boil, but all the other brewing equipment, like the kettle can take some time to clean, especially if you have an electrical element in your kettle to scrub. I usually do a quick rinse with hot water then fill up the kettle with a weak PBW mixture (usually 2 TBS per 5 gallons). I throw all things brewing in the kettle and let it sit 24 hours.
The next day, all I have to do is rinse off all the brewing equipment. The kettle just needs a gentle scrub and it comes clean.
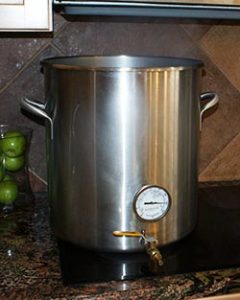
6. Siphon Quicker by Not Siphoning at All
By using a mesh strainer you can cut some time off of your brew day. Siphoning can take 10-15 minutes. If you are brewing extract, then dump the brew into your bucket thru a strainer. You can also attach a ball valve to your kettle and drain off into your bucket. The opening on a ball valve is wider than the siphon tubing allowing for a faster transfer.
Using all these tips can significantly cut your brew day time by hours. I can now brew with little notice and don’t have to plan a whole day around it, which makes it more enjoyable for me. And for you hopefully.
Original post on: https://learn.kegerator.com
Leave a Reply
You must be logged in to post a comment.